Walkthrough
1. Introduction
To better understand how Super Protocol works, let's take a step-by-step walkthrough through the Marketplace GUI.
As an example we'll deploy the Super Chat app with the tunnels. Please note that for this walkthrough we'll be using Tunnels Launcher, which cuts a few corners in order to streamline the experience. For the full tunnels deployment capabilities please refer to this guide.
You might want to read up on the fundamental Super Protocol concepts - such as offers, orders, requirements and configurations, and tunnels - in advance, or - just dive into it and figure it out as you go. Your choice.
The main steps you need to take are inside the blue ribbons. There are many additional explanations for educational purposes, but the essential Marketplace GUI is as easy as a few clicks.
Let's begin by going to the Marketplace GUI at marketplace.superprotocol.com. At this point we assume that you have completed all the preliminary steps here.
2. Building the Order
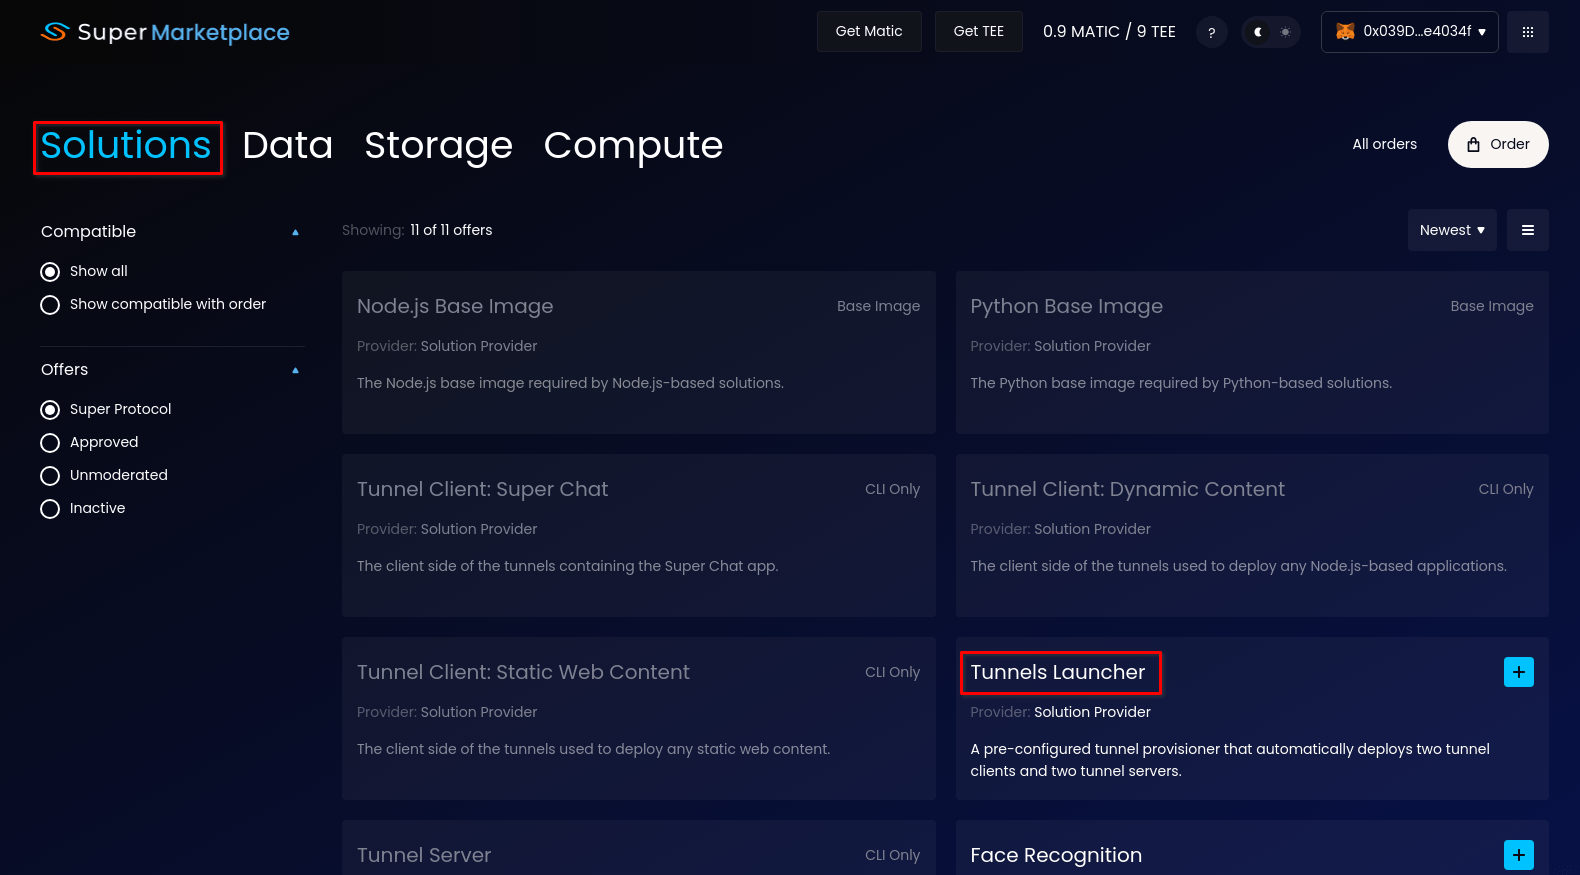
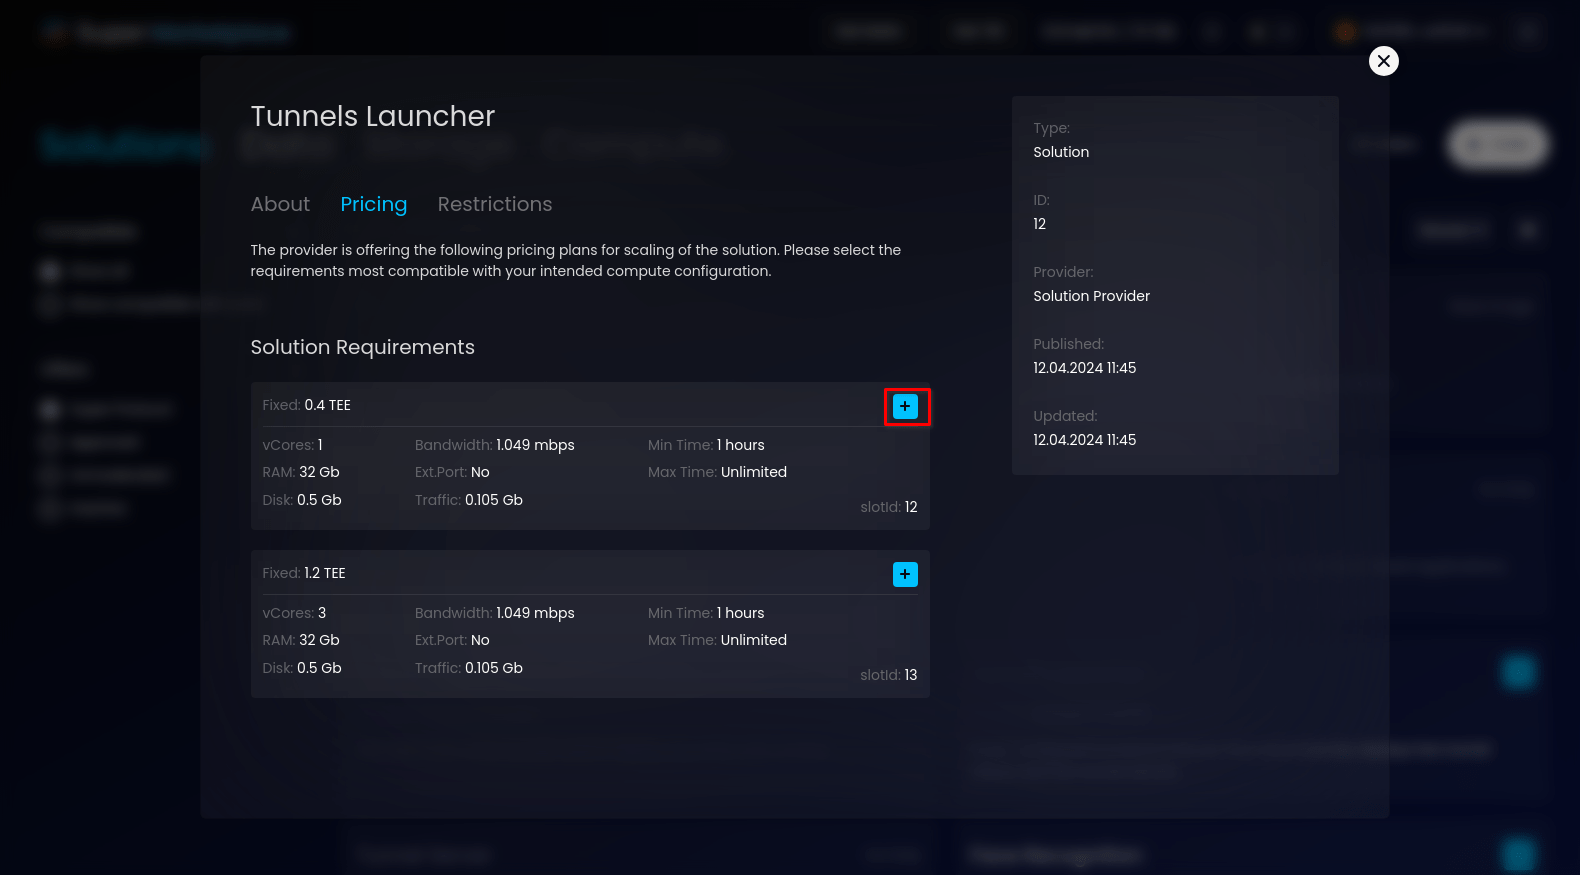
Go to the Solutions tab and click on the Tunnels Launcher offer. It will open a window with a detailed description of the offer. Pick a requirements slot and press [+] or Add to order.
Here you can pick the desired requirements for Tunnels Launcher. Learn more about Requirements. In short: requirements specify how many computing and internet resources the solution or data offer needs to run. You can also read about offers.
You can also see in the Restricted tab that this Solution requires another offer: a NodeJS base image. It is added to the order automatically.
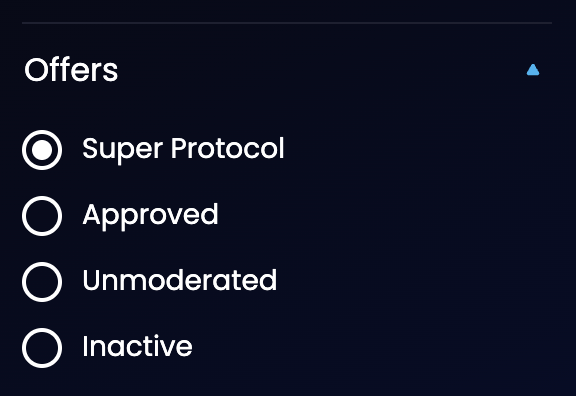
For the Solution and Data offers Marketplace GUI has a special filter that divides the offers in four categories:
- Super Protocol - offers produced by Super Protocol;
- Approved - community offers that were reviewed by Super team and considered acceptably operational;
- Unmoderated - community offers that were not reviewed, all offers end up here by default;
- Inactive - offers that did not respond to a request to create a new order, considered non-functional and likely abandoned.
- Inactive - offers that do not respond to a request to create a new order, considered non-functional and likely abandoned.
For best results use offers either from Super Protocol or Approved categories.
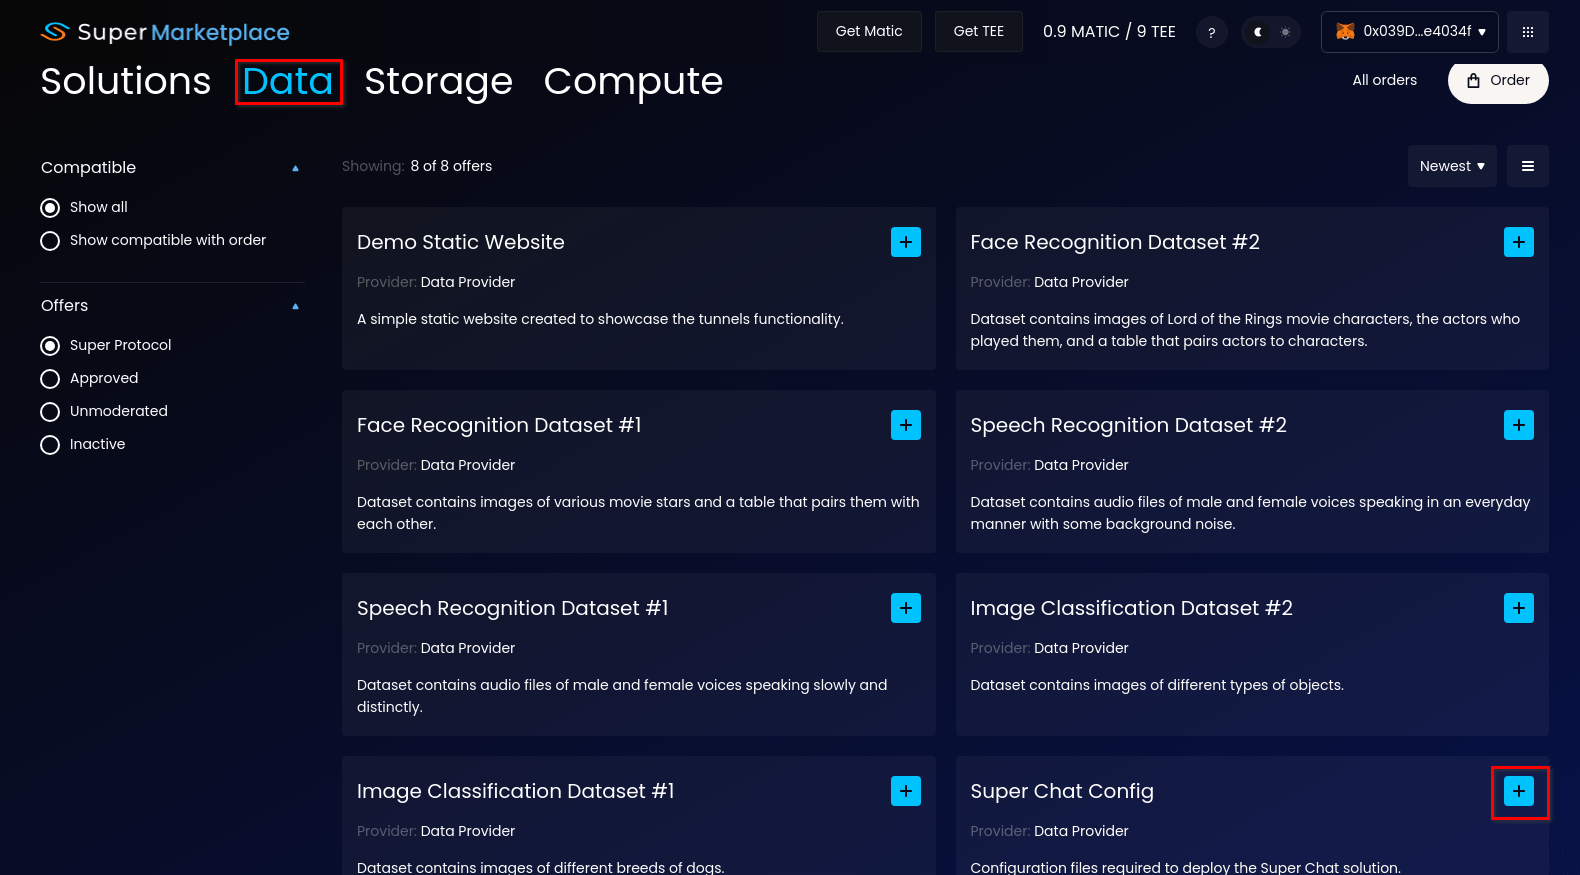
Go to the Data tab and add the Super Chat Config offer to the order. This will add the minimal requirements.
Note: The Super Chat Config data offer contains the pre-configured settings such as DNS and SSL credentials to make deployment of Super Chat through the Marketplace more user-friendly for beginners. But this means that this deployment will be created at *.superprotocol.io domain. Advanced users can deploy with custom configuration through CLI.
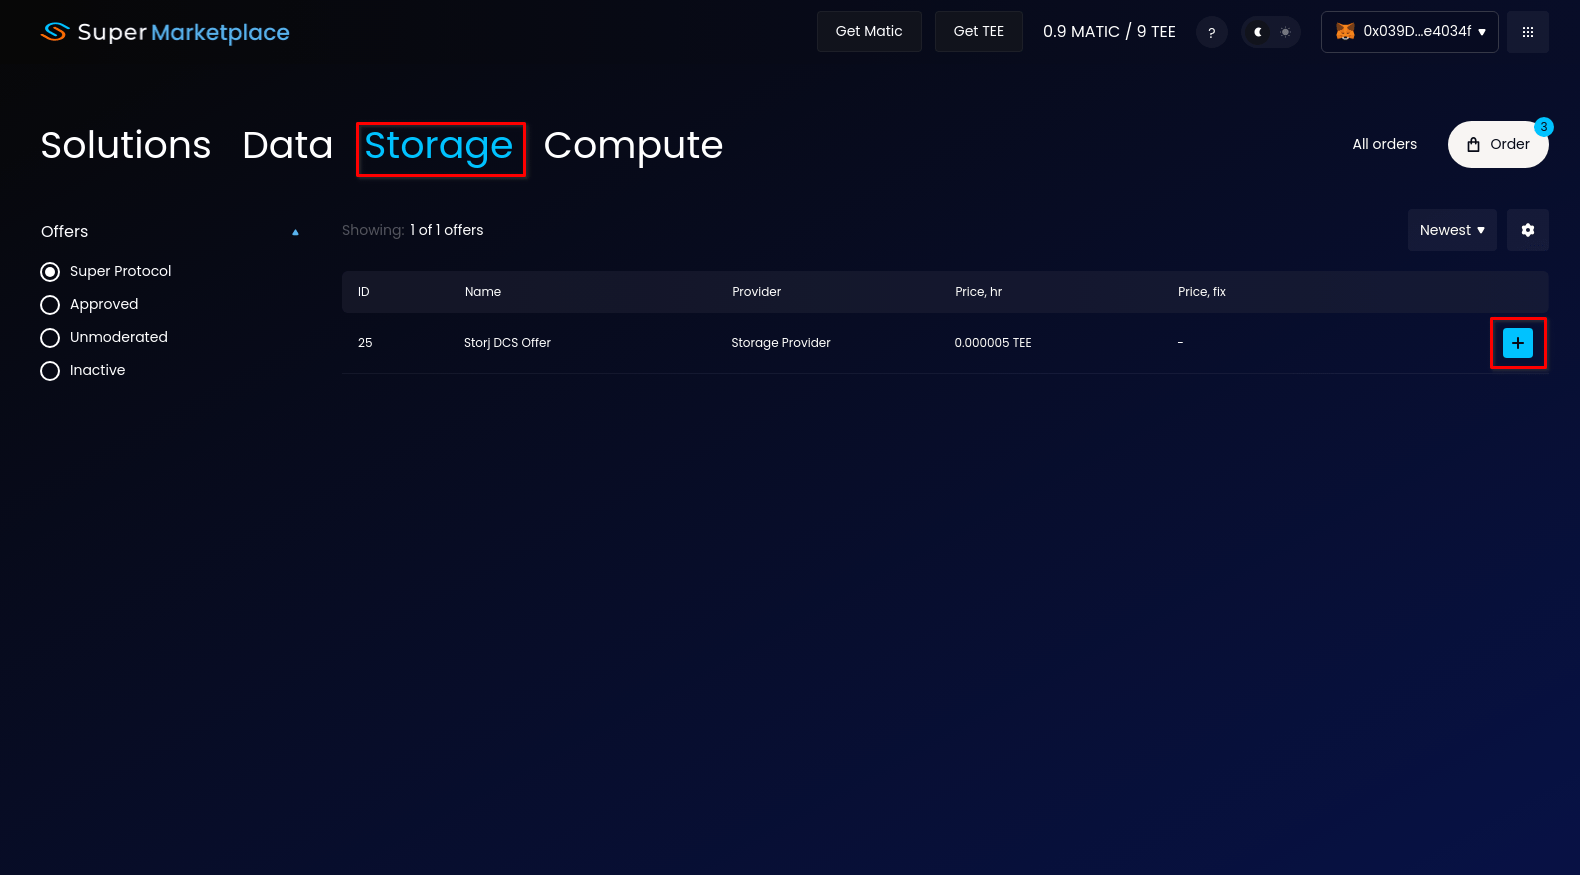
The storage offer is responsible for storing offer contents and order data. Go to the Storage tab and add the StorJ offer to the order.
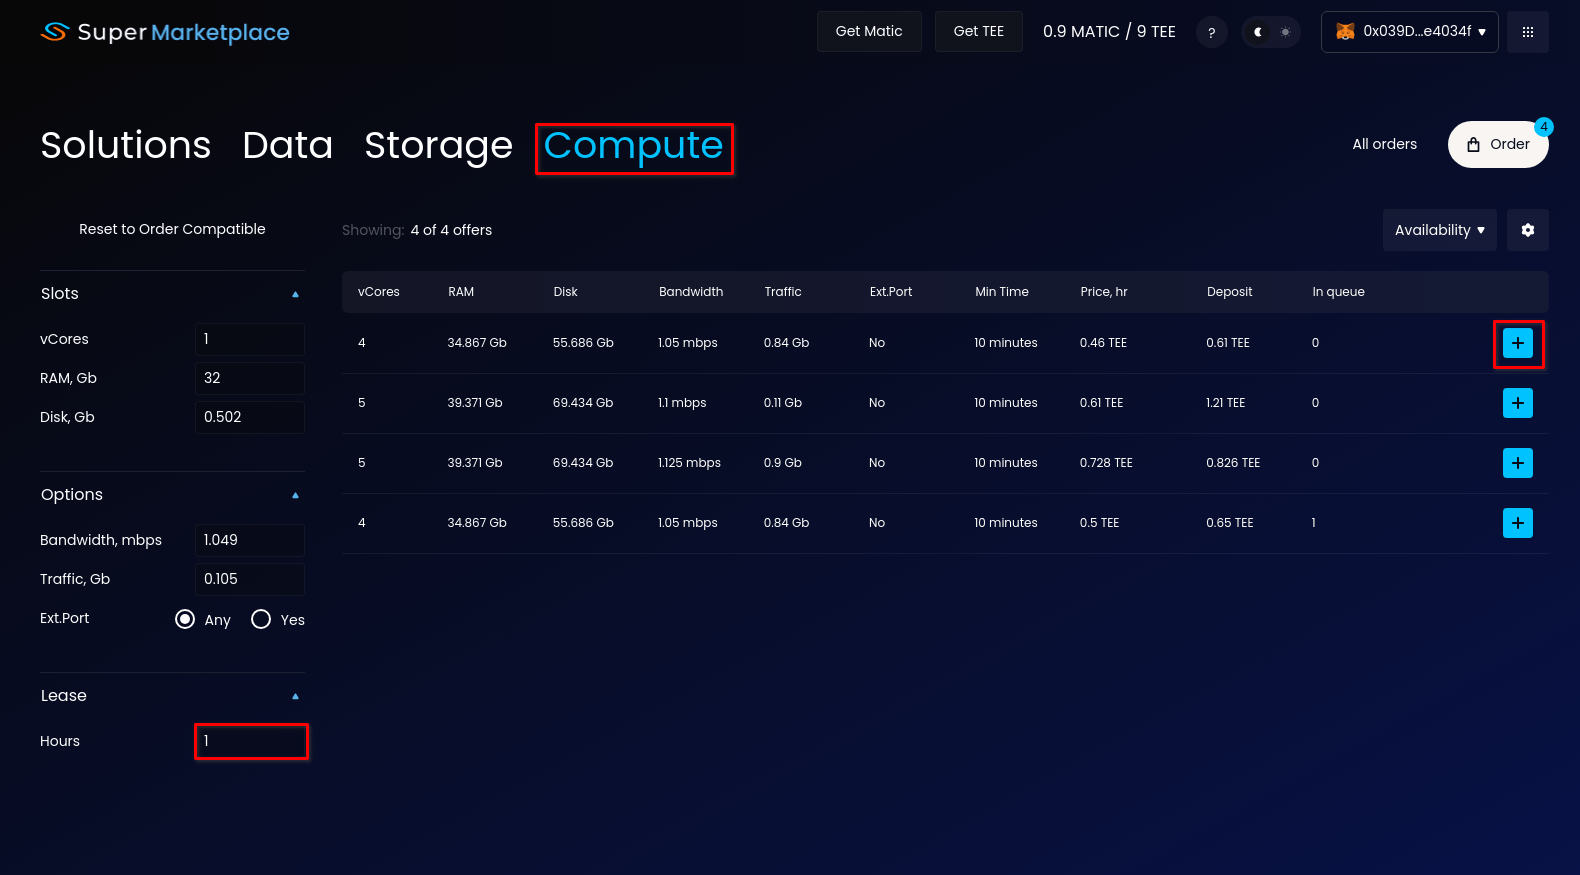
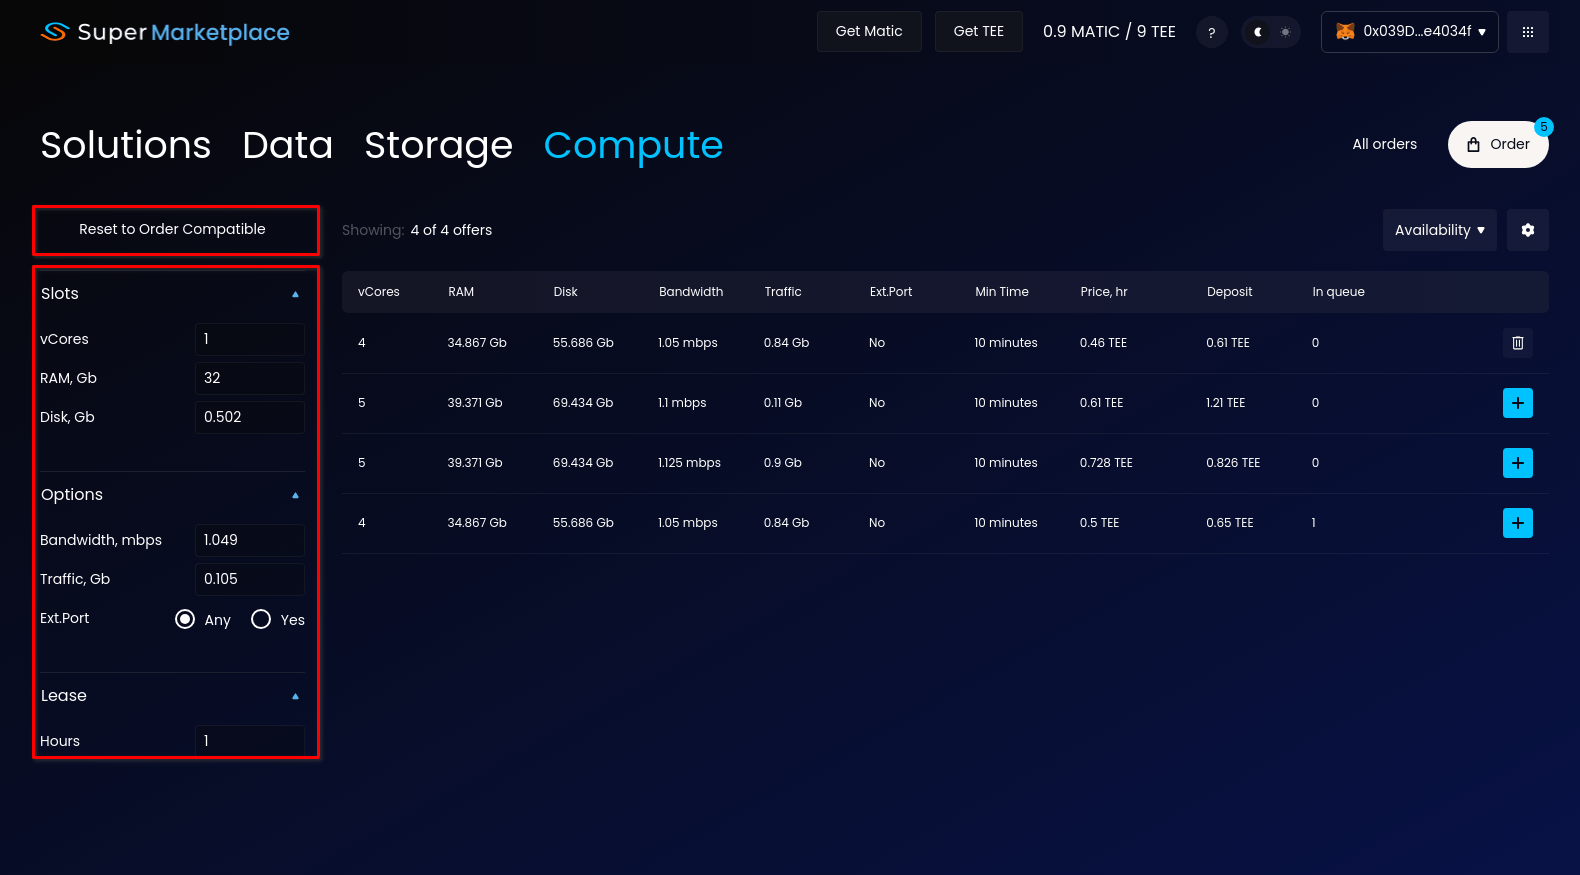
Finish building the order by selecting a configuration of computing resources. Go to the Compute tab. Select desired Lease time: let's say 1 hour. Then add the first compute configuration to the order using the [+] button.
For most users it's really as simple as two clicks, but since this is an educational guide, we will go under the hood (again, read about slots).
Now that you have added all the other offers (solution, data, storage) to the order you know what kind of compute configuration you will need: it has to be equal or exceed the requirements. The filters to the left are automatically pre-populated with the total sum of these requirements. The Lease determines how much time you will be initially renting the compute for - we start with 1 hour, but you can always replenish the order later to extend the lease.
Based on the requirements, our Auto-Select feature will automatically come up with configurations for different compute offers. All of those will be sufficient to run your solution and data. But you can choose between them.
It's usually best to select the cheapest order, judging by the Deposit column, which is how much you have to pay to create the order for 1 hour or whatever your Lease value is. You can also uncover additional columns such as Price per Hour and Price Fixed (one time payment). Another criteria is In Queue - how many orders are waiting in line to use this machine. It makes sense to make the configuration that has the lowest queue.
After you have added the compute configuration, let's see what is happening inside. Click on the compute configuration line and the offer window will open up. These are all the available Slots (computing power) and Options (internet access) for this compute offer (the machine). You can see that the auto-select combined multiples of slots and multiples of options to give you the best value for what you need. These slots and options are set up by the compute providers, so it's a very flexible system.
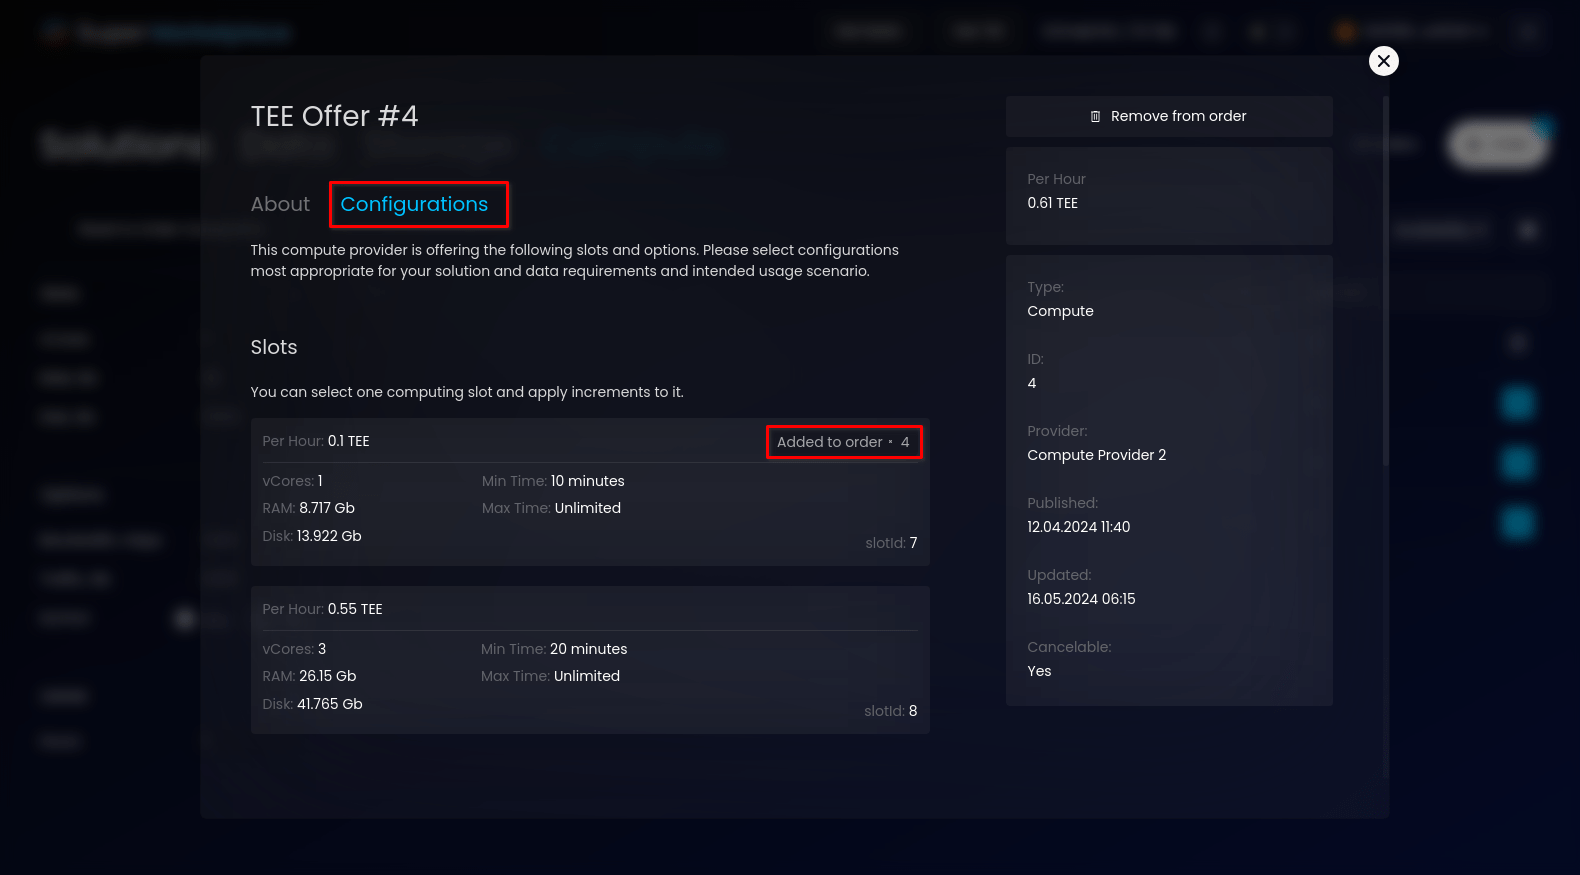
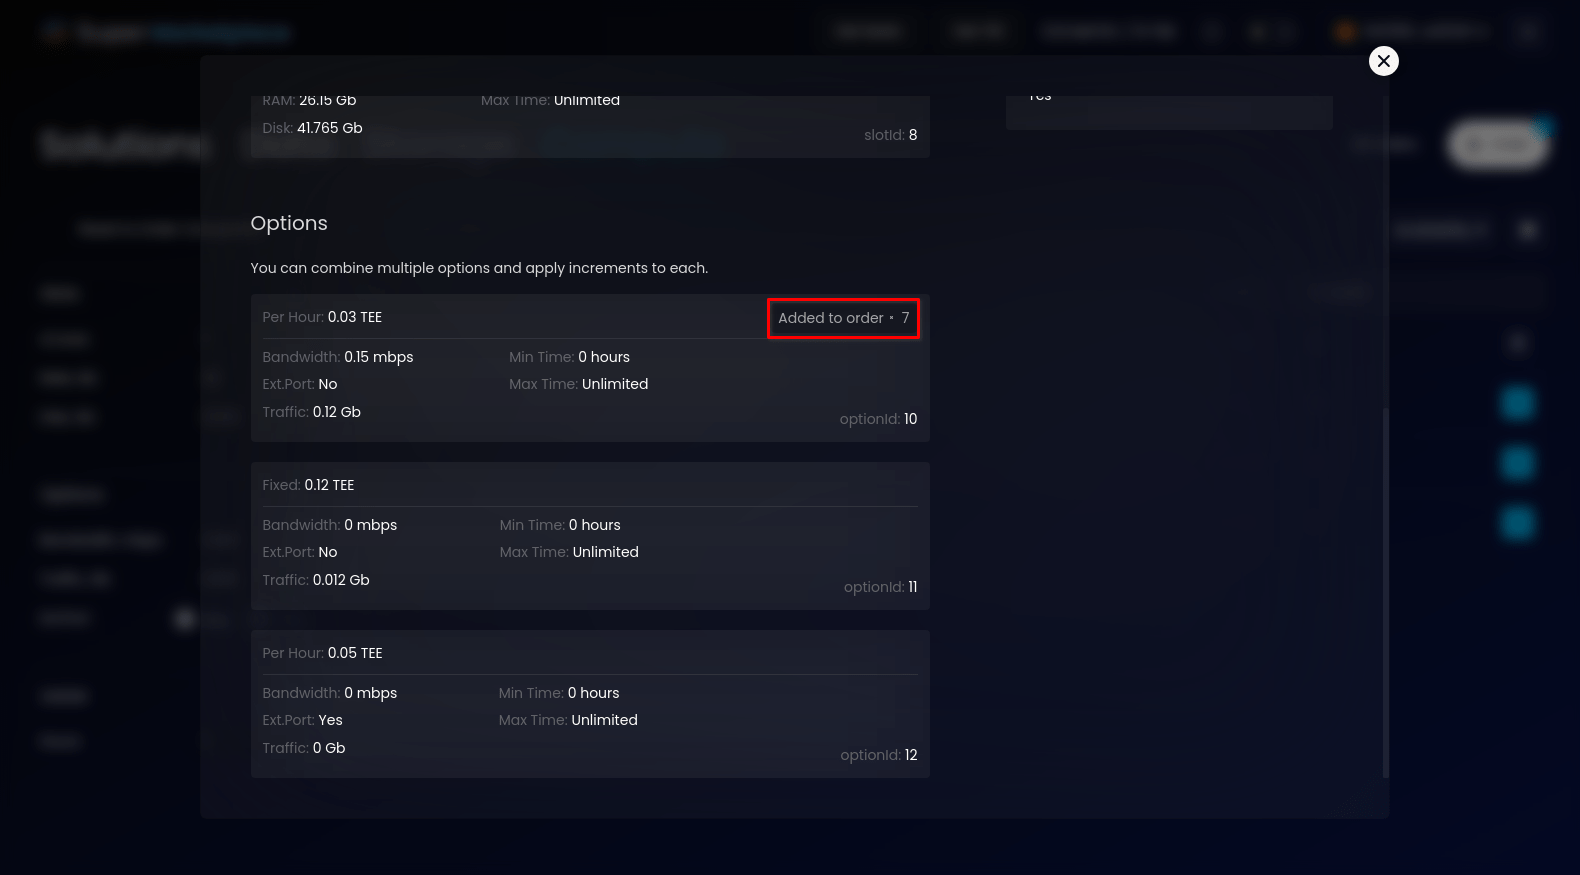
You can also customize your configuration. Modify these fields as you see fit, but be mindful of the testnet limitations. The auto-select will update the configurations list automatically. You can press the Reset to Order Compatible button to reset back to the requirements as added to your order.
3. Creating the Order
Now that all the offers have been added, it's time to create the order. Learn more about orders.
Open the Order window and press the Checkout button.
Here you will also see some totals:
- Fixed - the total Fixed Price for all offers, this one time payment is charged only once when creating the order.
- Per Hour - the total Price per Hour for all offers. Now this is how much you can be expected to be charged every hour that your order is processing.
- Lease - how much time, in hours, you initially want the order to work. This affects your deposit.
- Order total - how much you paying right now to create this order (also, the deposit) using this formula: Fixed + (Lease * Per Hour).
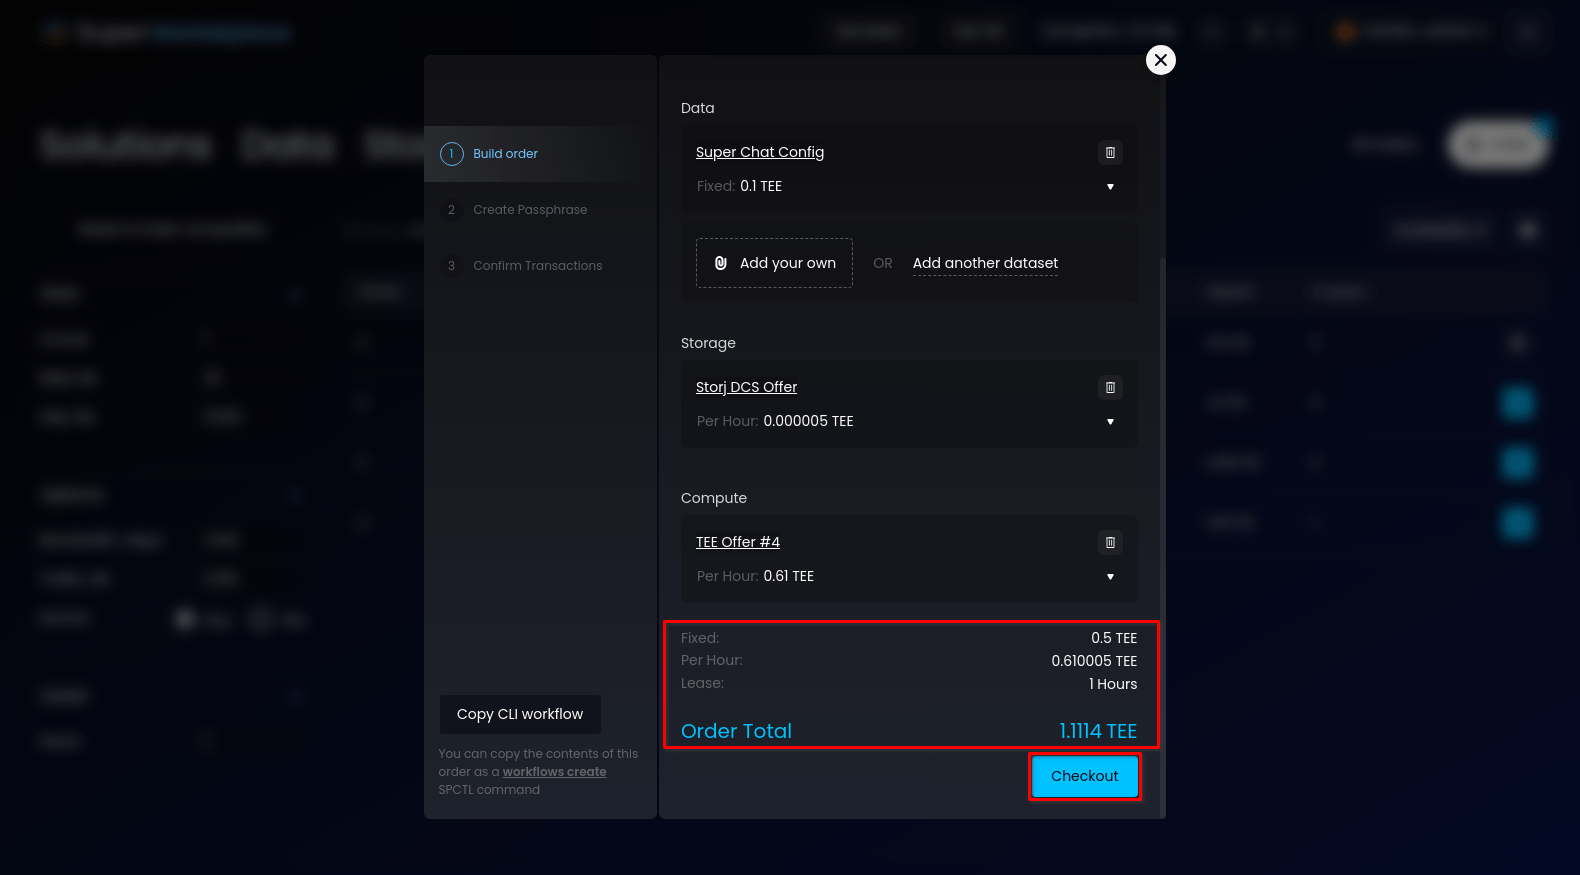
You can also see the total requirements or configurations by offer.

To create this order via CLI, click the Copy CLI workflow button. It will generate an SPCTL command using the current order setup and copy it to the clipboard.

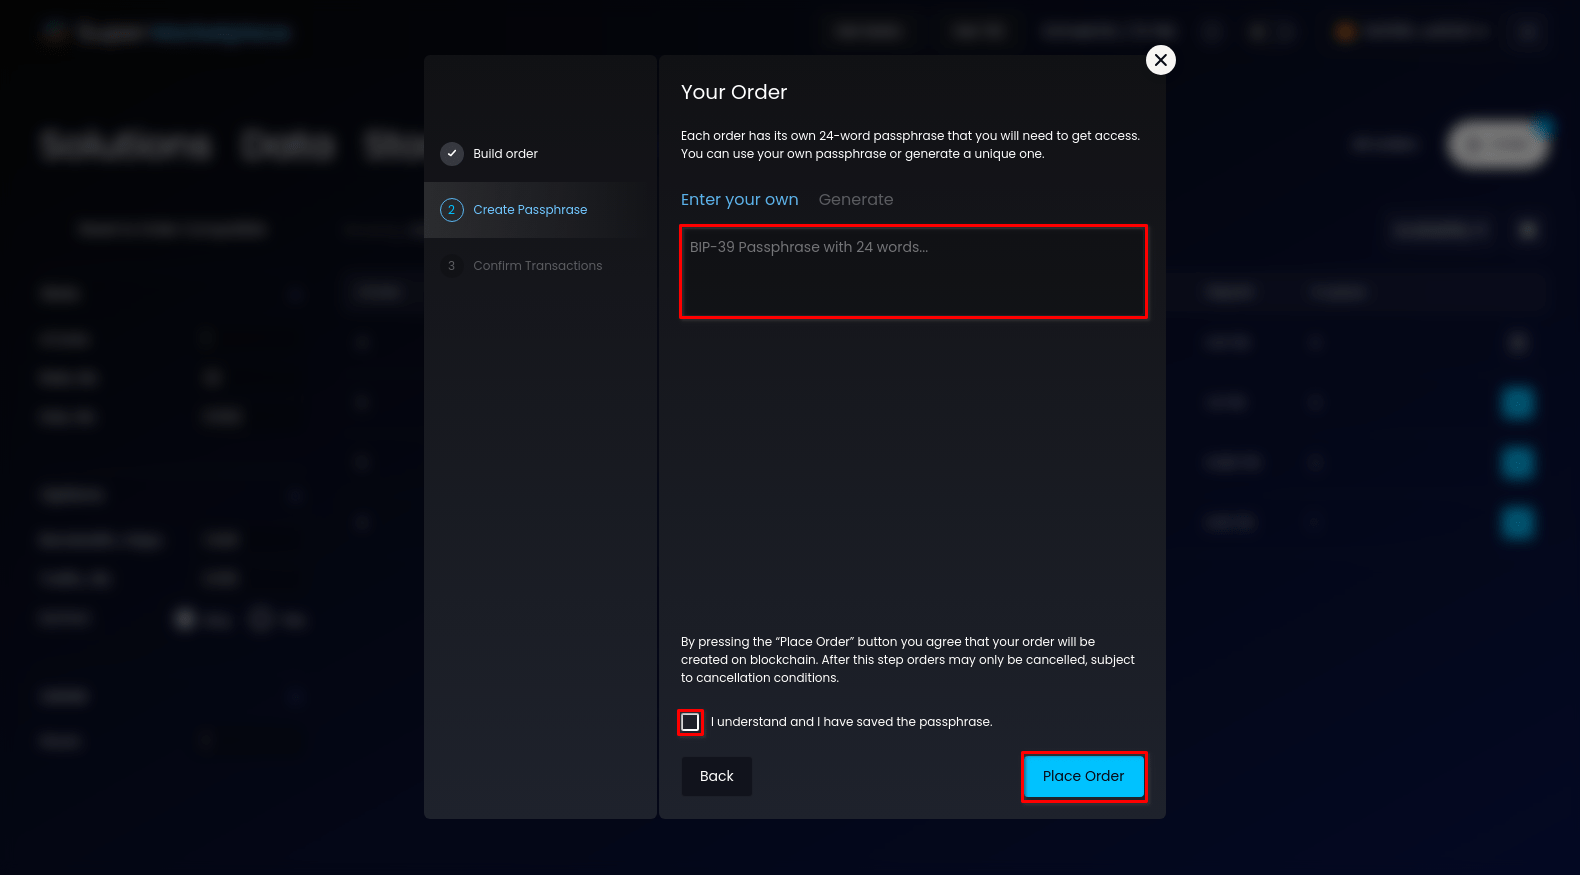
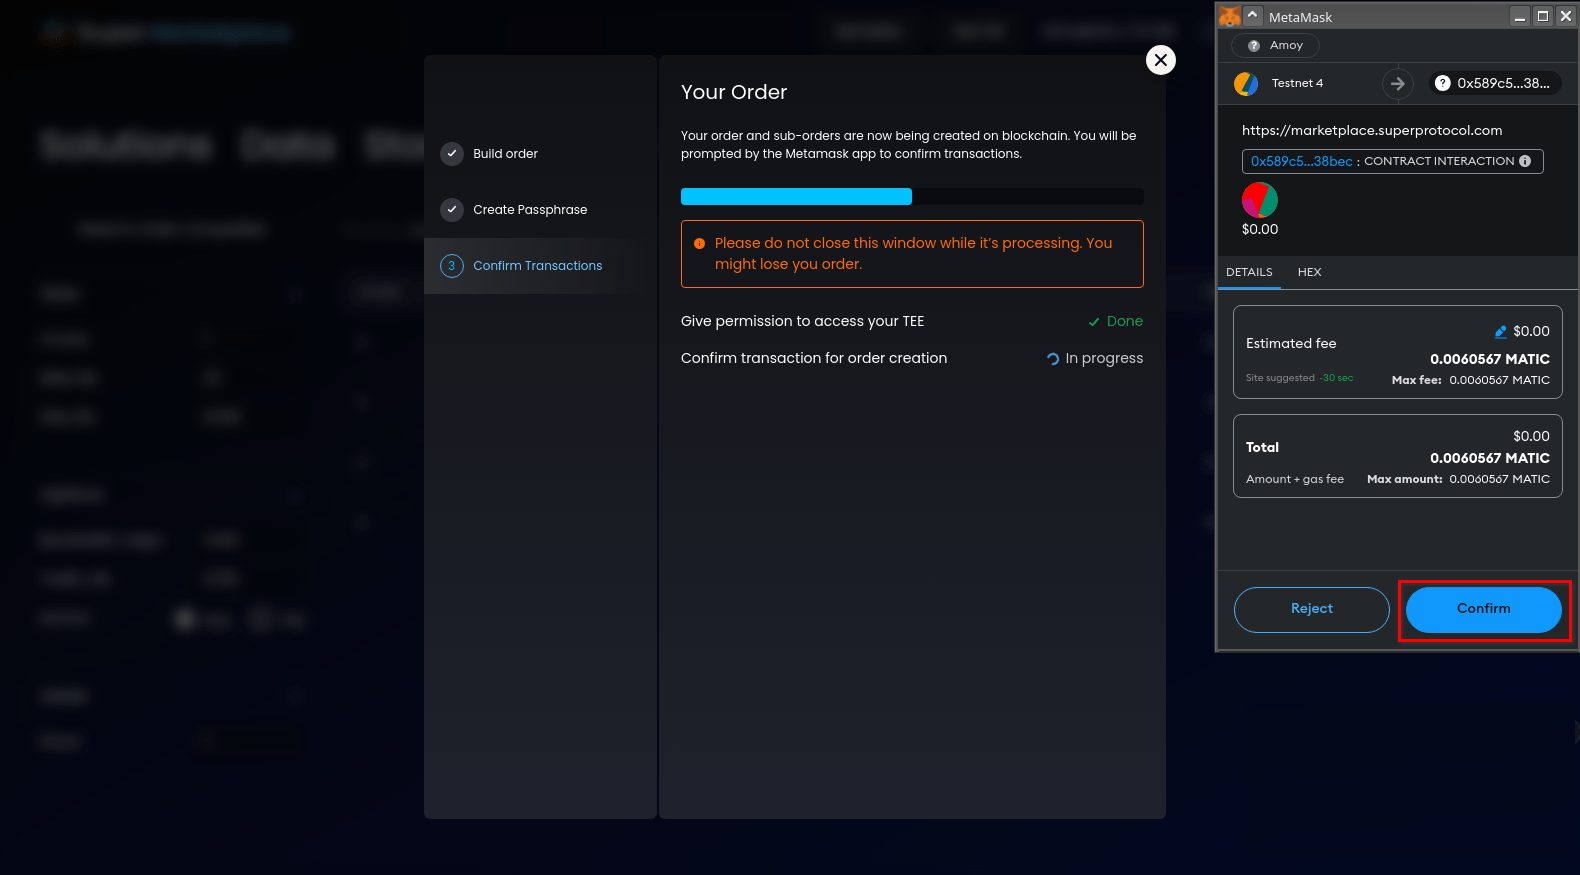
Either input your own passphrase or generate a new one. Then press the Place Order button. Save your passphrase! You won't be able to access your order results without it. For testing it's easier to have a single passphrase for all orders.
Note: MetaMask is used only for Marketplace GUI. When creating orders via CLI your passphrase will be a part of your SPCTL configuration.
If this is your first time using SP Testnet, MetaMask will ask you to approve the maximum spend allowed from this smart contract. This feature is made by MetaMask for your protection. But for purposes of Testnet you can set unlimited cap. Press Use Default, then Next at the next screen, and Approve at the next screen again. You only have to do this once.
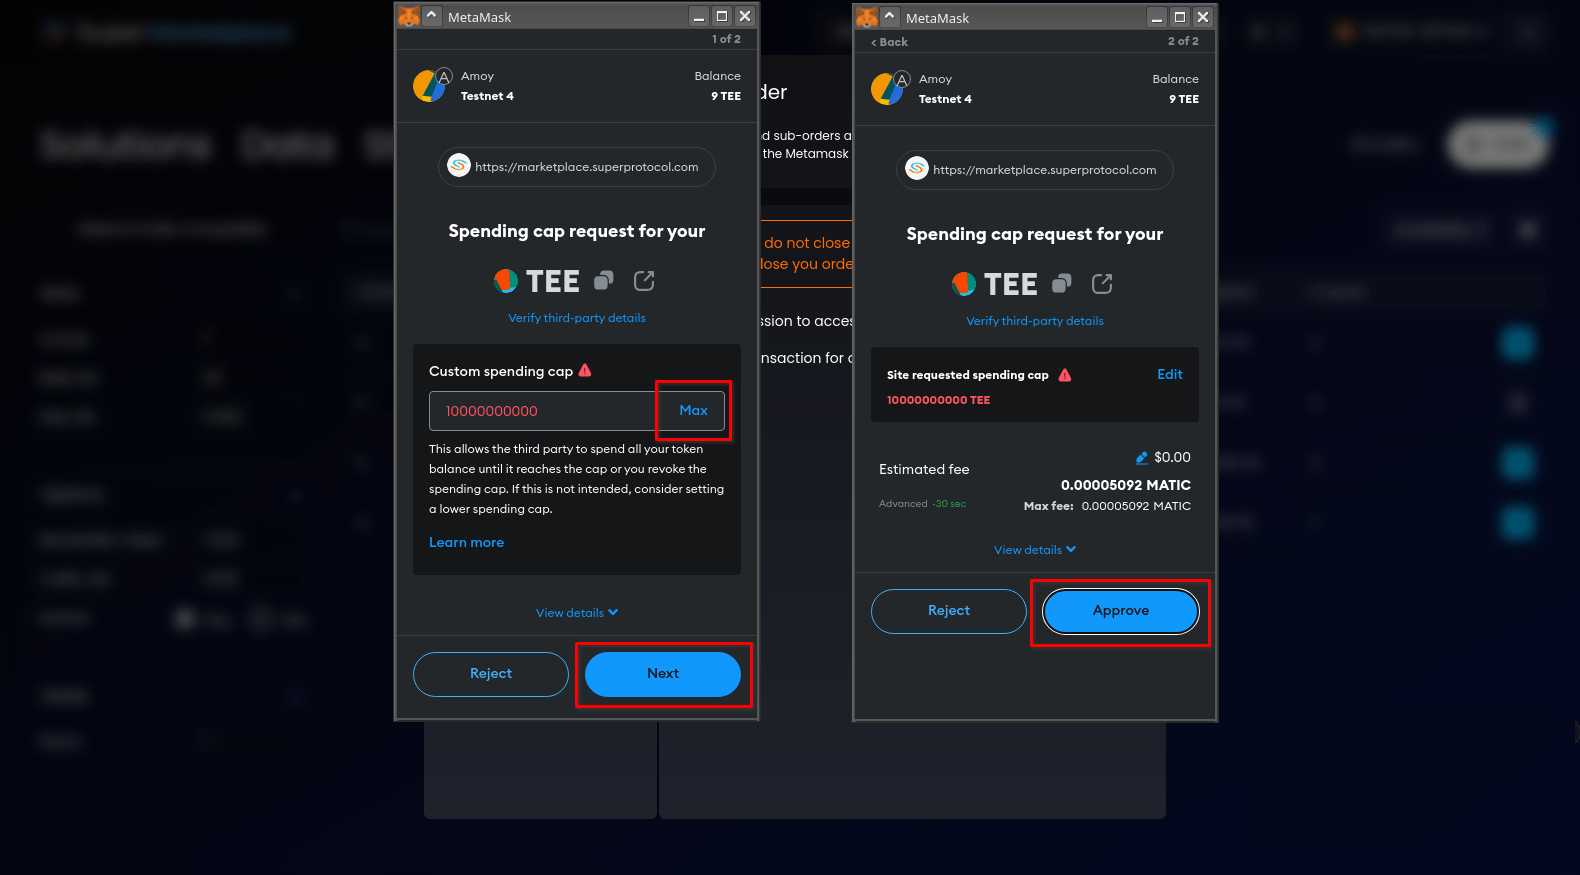
After you have set up the Spending Cap for this smart contract, further approvals are much easier: just press the Confirm button when MetaMask prompt appears. If its window doesn't open automatically or hangs on the loader screen, open it manually from the browser extensions.
4. Getting Results
At this point your Tunnels Launcher order is either waiting in queue (status New) or is being executed (status Processing).
If not forwarded to the order automatically, press the All Orders button and then click on the last order in the list.

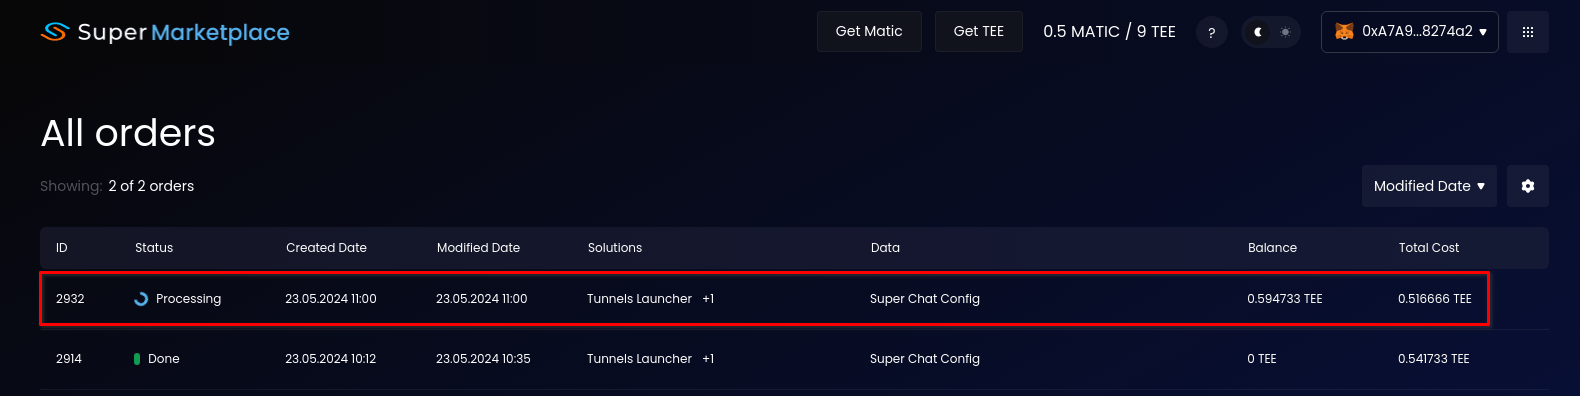
Creating the tunnels takes about 20-30 minutes. You might need to refresh the page to see the status change.
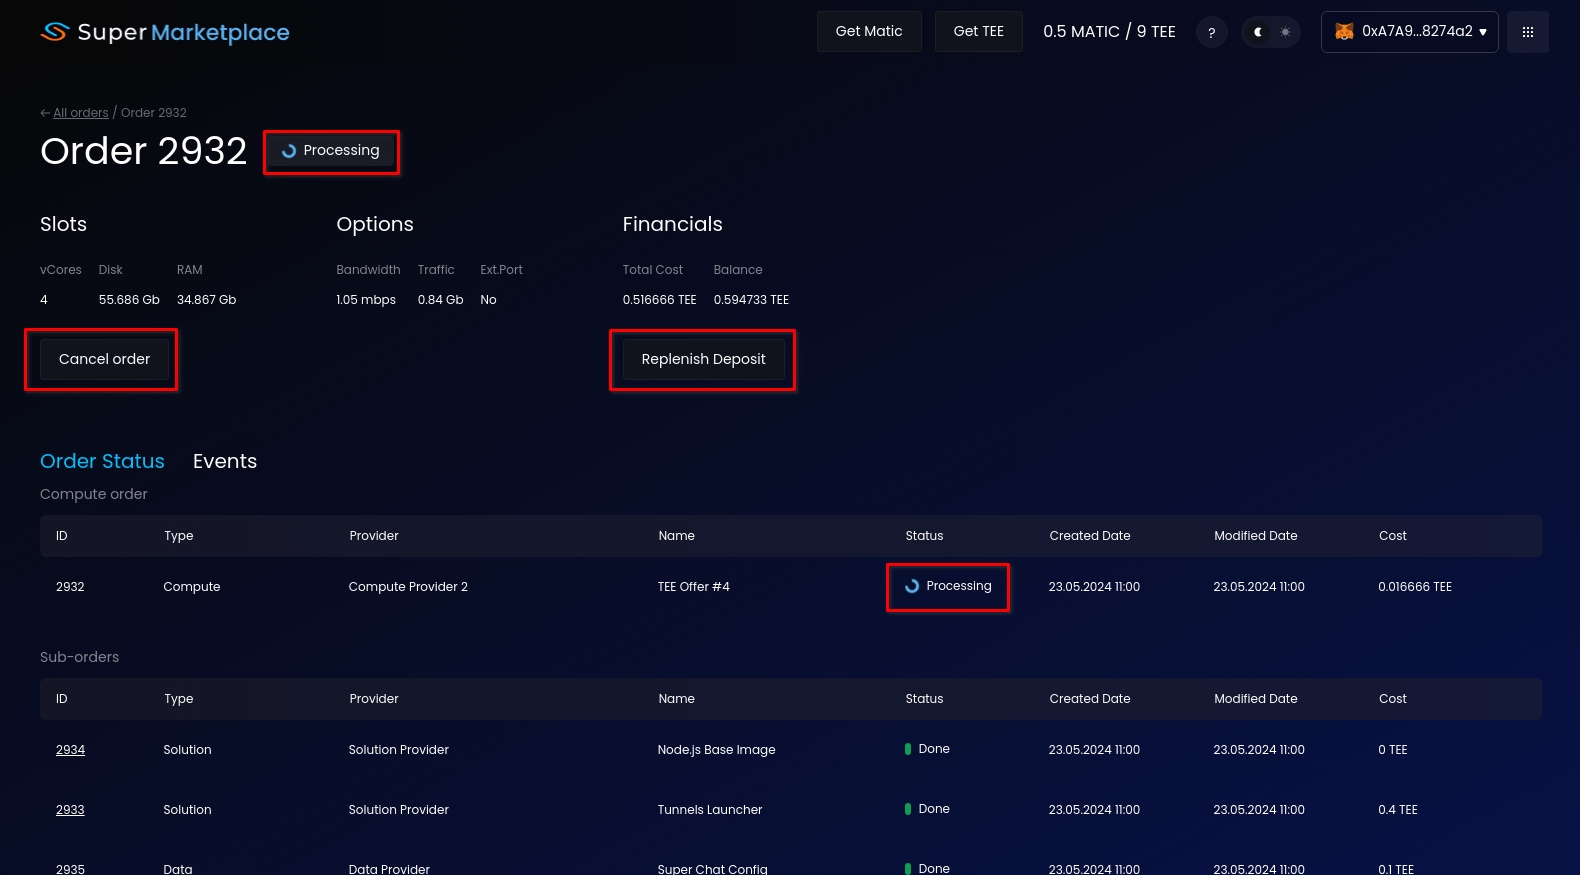
But while you wait, let's talk about the order. It consists of the main compute order (whose status is also the order status) as well as sub-orders, which are all the other offers, each with its own separate order related to the main order. The other offers are in status Done because they have transferred their content to the compute for execution and that's where their function ended. But - you might still be paying hourly to the providers of those offers.
A very important function is Replenish Deposit. Predictably, the order keeps working only as long as there is money (SPPI tokens) on the deposit. The deposit is being decreased every hour by the total Price Per Hour amount that you saw when creating the order. This includes charges by the compute, but also possibly by some other offers if they charge by the hour. When the deposit ends - the order stops. But you will be warned in advance when your deposit nearly depleted - you will see a very orange Awaiting Payment warning, which means that it's time to refill your deposit (if you want).
The order changes to status Done - tunnels are deployed. Press the Get Result button and enter the passphrase that you used when creating the order. You will see a link - this is your brand new Super Chat URL.
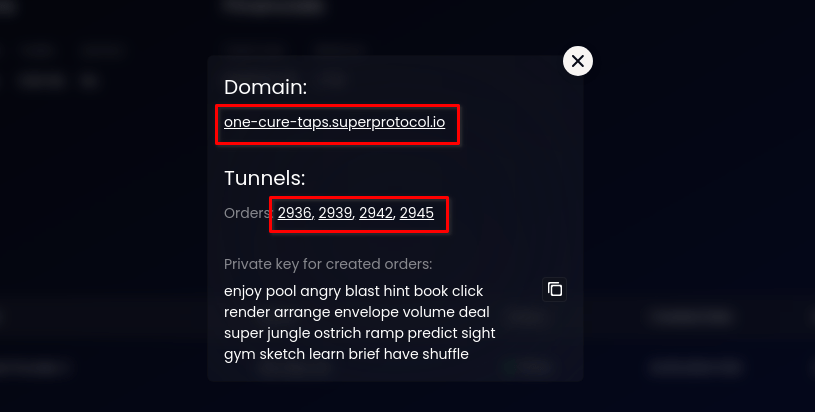
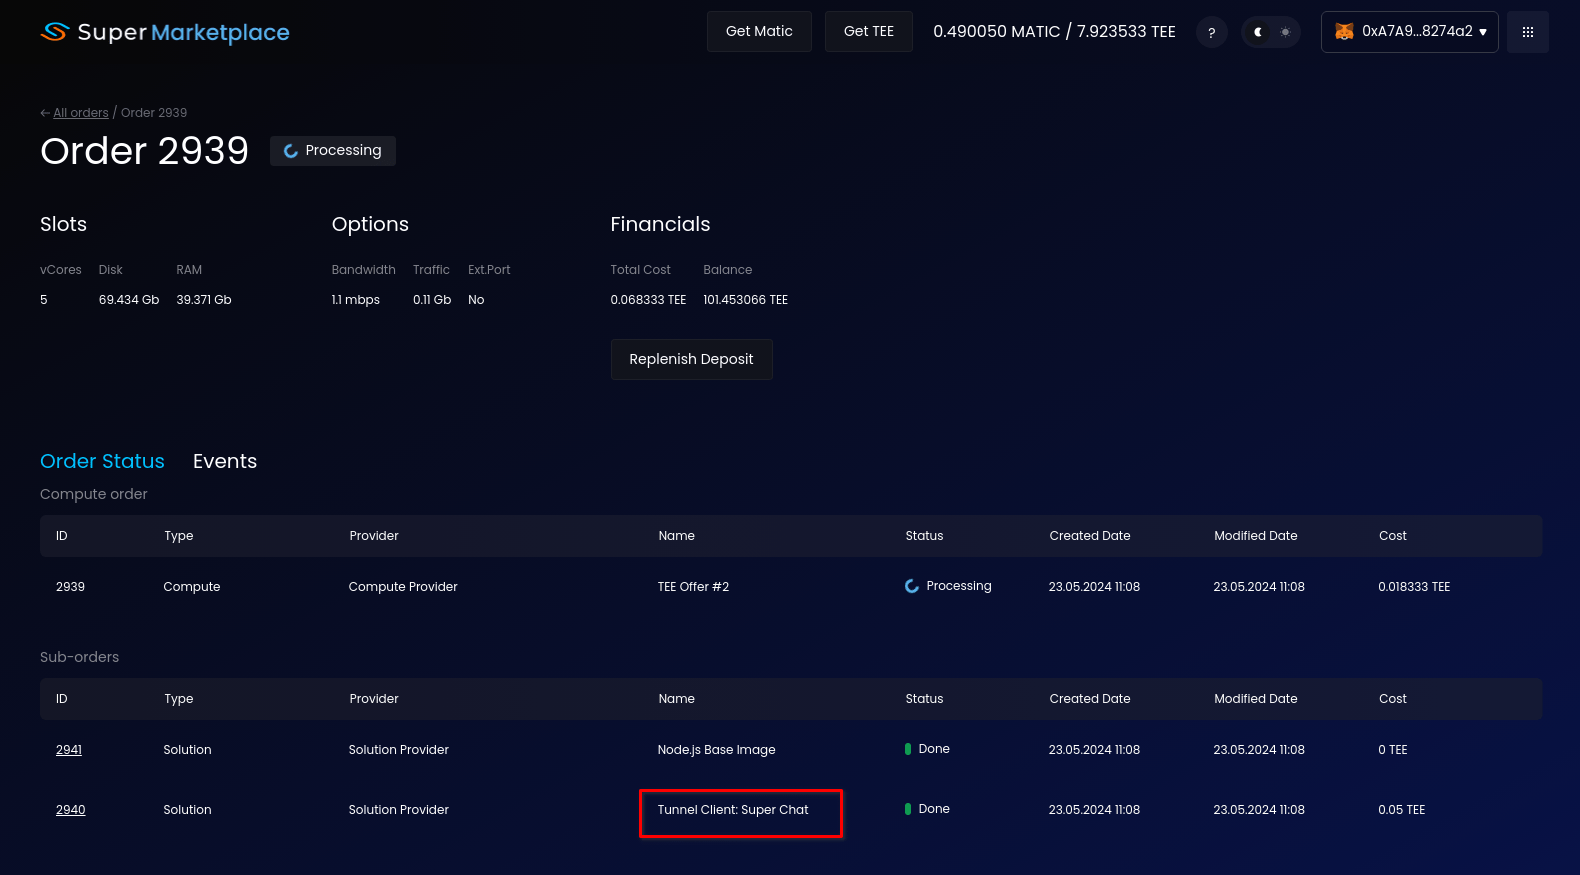
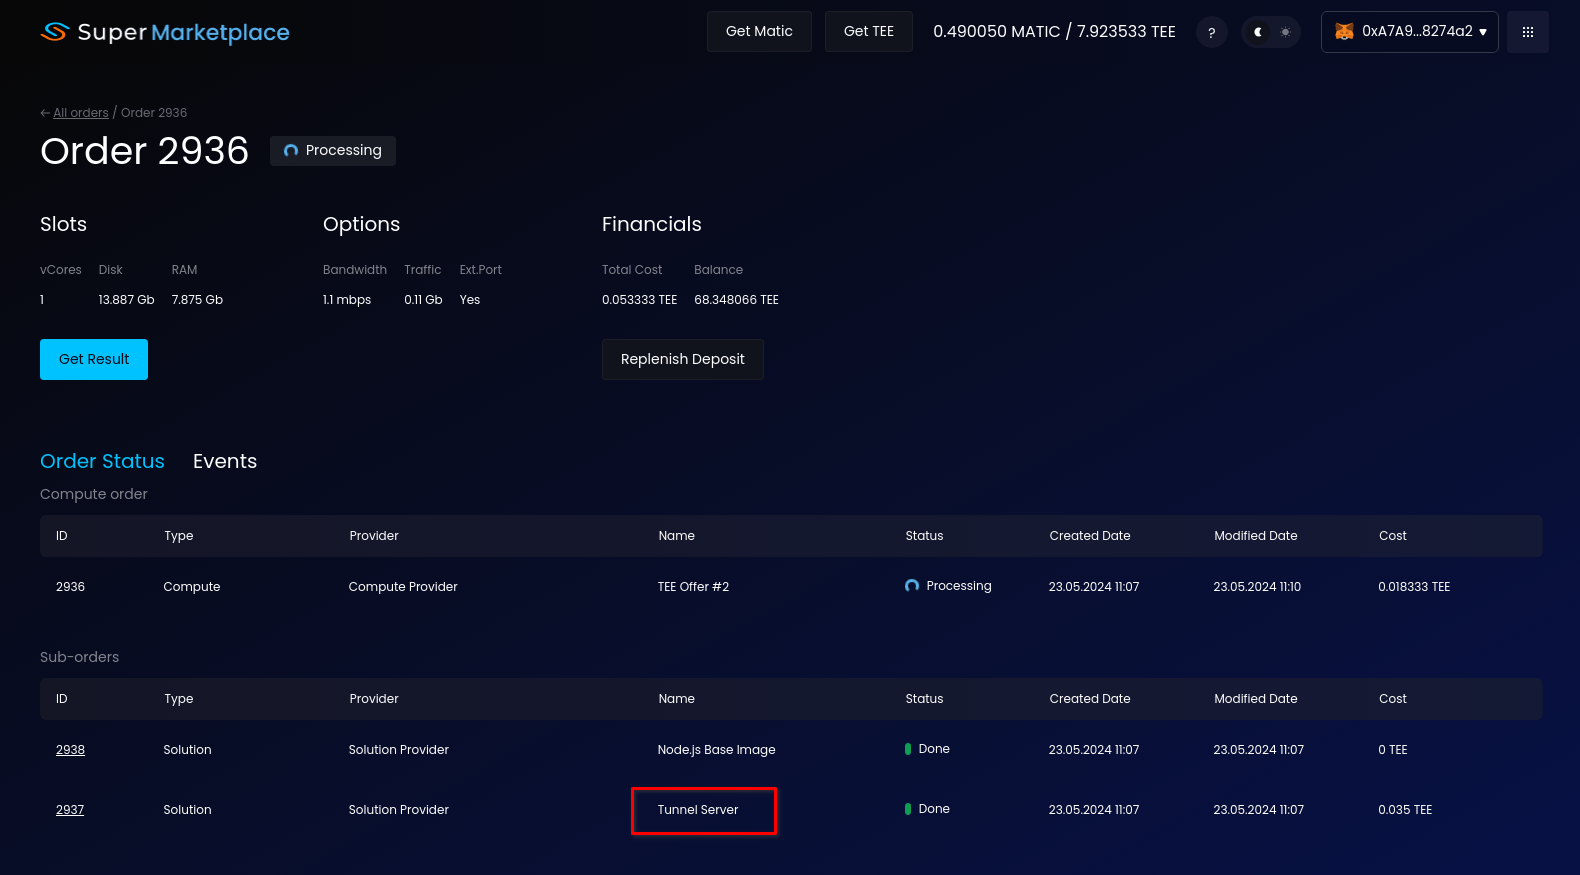
But that's not all. The Tunnels Launcher has created tunnels: two servers and two clients, each with its own order ID. If you want to keep them going, you need to replenish their deposits. Go to each individual ones and press the Replenish Order button. Do this as many times as you need to keep the tunnels going.
As mentioned in the beginning, the Tunnels Launcher is a pre-configured provisioner app that automatically creates a set of tunnels. The Launcher has fulfilled its mission and terminated (status Done). But when you go to the individual tunnel orders you will see that they are processing - which means that they are up and running, and will be running as long as you keep the deposit up - at least for tunnel orders created via CLI. For tunnels created by Tunnel Launcher the built-in limit is 72 hours.
Note that the tunnel client is running the Tunnel Client: Super Chat solution offer, it's basically a pre-packed offer with the Super Chat app inside, created specifically for Tunnels Launcher. You can deploy one just like that using CLI and this guide.
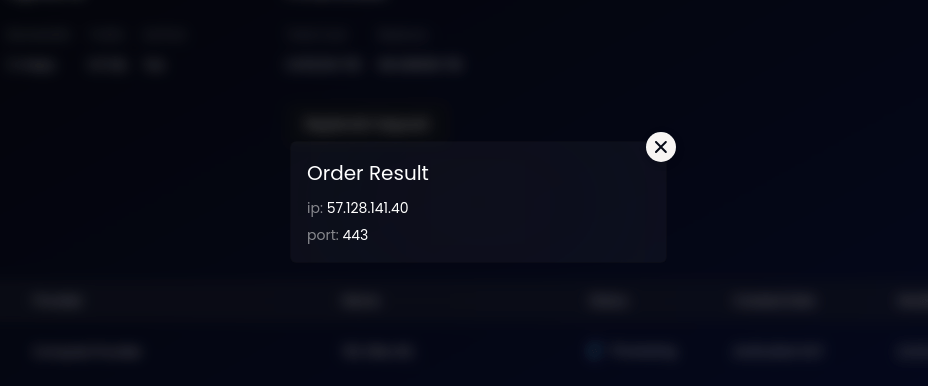
Another note: tunnel server has a blue Get Result button. To open it you will need the Private key for created orders which you got from the Tunnels Launcher in Step 10. The result of the tunnel server is its IP and port. When deploying via CLI you would need this information to set up the DNS for your own domain.
And yet, this is not all! Follow this guide to verify the Intel SGX TEE quotes for your newly created domain: to make sure that the solutions are in fact running in a confidential environment inside the TEE and that the connection is secure.