First Steps
This guide provides step-by-step instructions to help you set up MetaMask and access the Super Protocol Marketplace via the web-based graphical user interface (GUI). If you want to use the command-line interface (CLI), check the Configure SPCTL guide.
The Marketplace GUI is available for anyone to browse even without the MetaMask extension installed. However, you need a Web3 account to access the full functionality of Super Protocol Marketplace.
The Super Protocol team sends out invites daily, but it may take a few days if the number of requests is high. You can ask any Community Manager on the Super Protocol Discord server about the status of your request.
MetaMask
MetaMask is a software crypto wallet available as a browser extension or mobile app. You do not need it to browse Marketplace offers. However, to create orders, you must install and configure the MetaMask browser extension specifically for the Super Protocol Testnet.
The mobile version of the Marketplace GUI is view-only. Use a desktop or laptop for full functionality.
If you already use a computer but still see the warning about the mobile version, expand the browser window to full screen.
Step 1. Install MetaMask
Download and install the MetaMask browser extension from its official website or your browser's extension store. During the setup, create a new wallet or import an existing one. Skip this step if you already have MetaMask installed.
Step 2. Add a new network
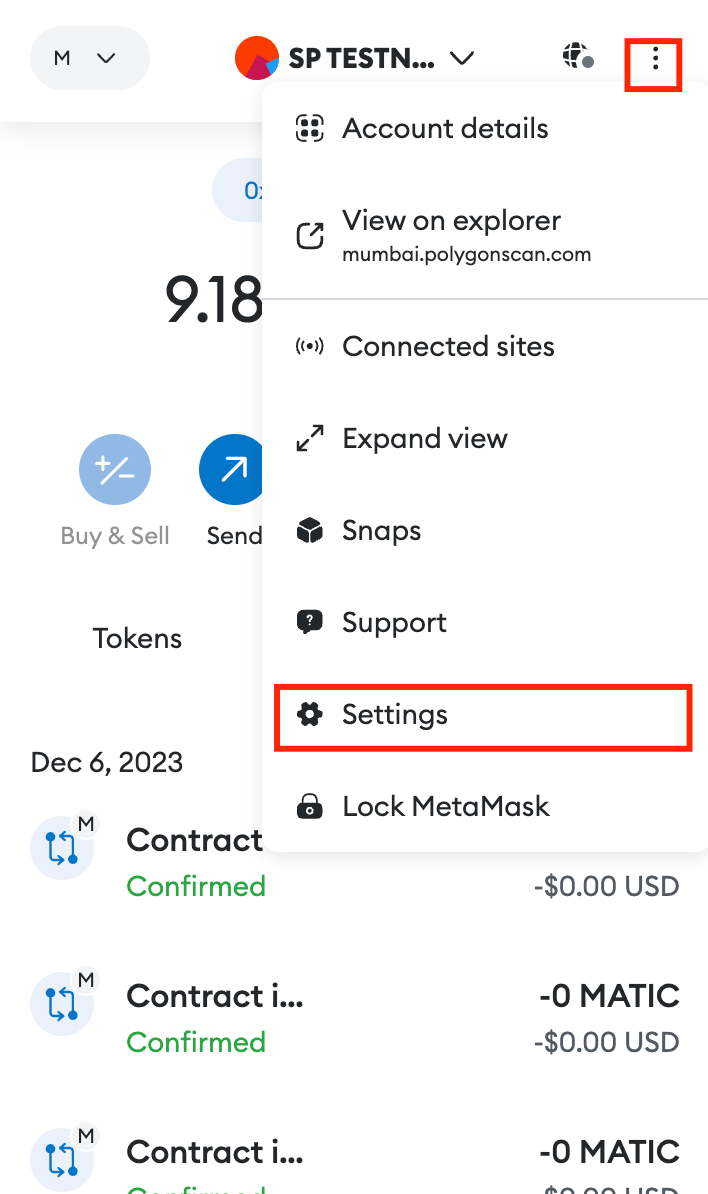
Open the menu by clicking the three vertical dots at the MetaMask window's top-right corner. Go to Settings and then select Networks.
There, press the Add network button.

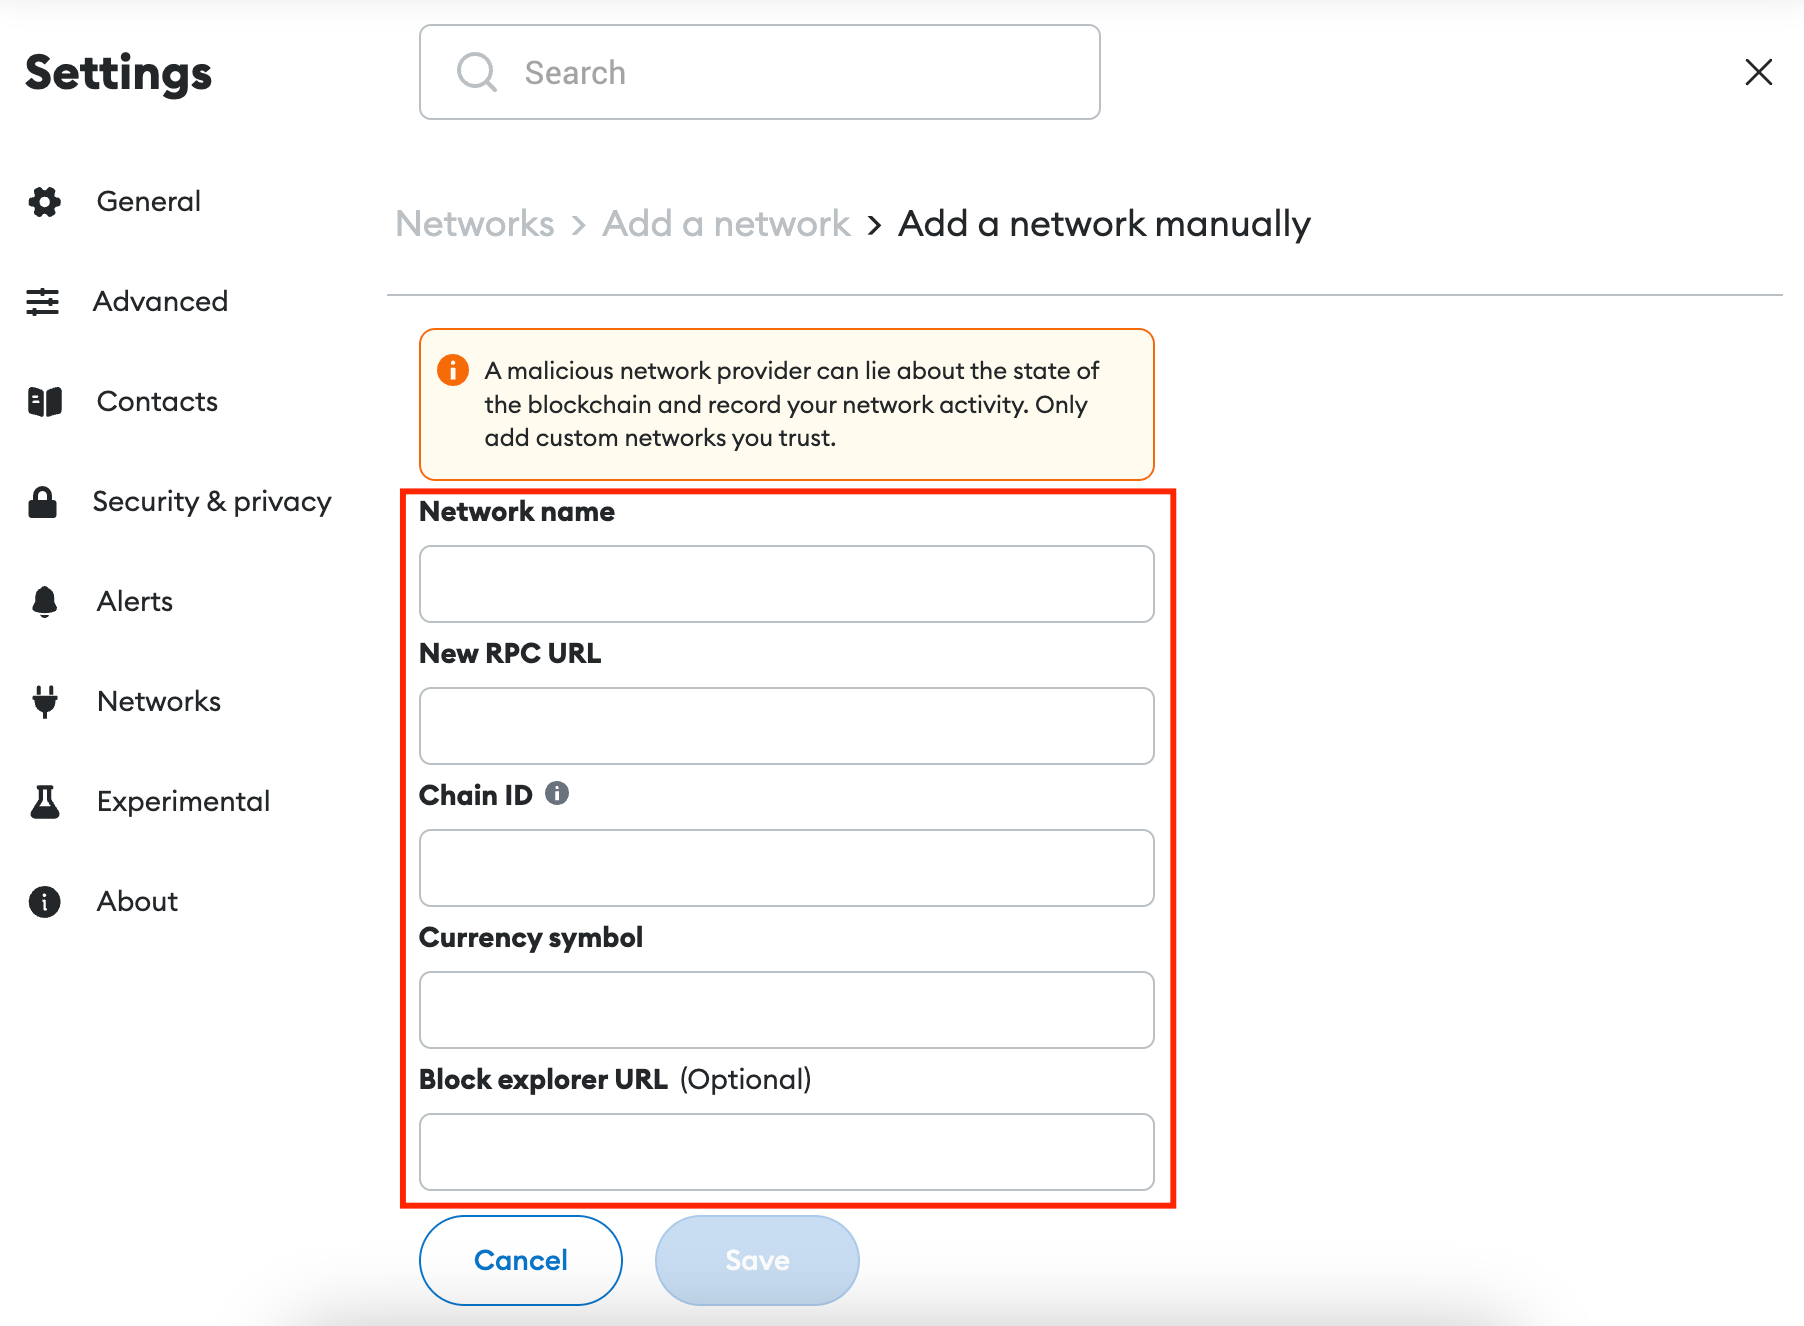
And then click Add a network manually at the bottom of the page.

Step 3. Fill in the parameters
Set the following parameters and press Save.
| Parameter | Value |
|---|---|
| Network Name | Super Protocol Polygon Amoy Testnet |
| New RPC URL | https://amoy.polygon.superprotocol.com/hesoyam |
| Chain ID | 80002 |
| Currency symbol | POL |
| Block explorer URL | https://www.oklink.com/amoy |
You can change the network name if you would like.
Step 4. Import the Testnet Account
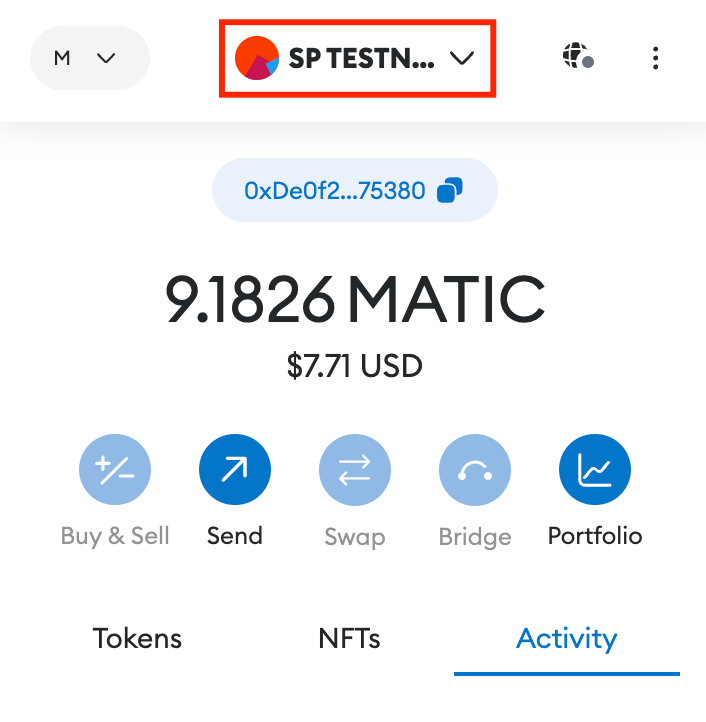
Click on your account name at the top of the MetaMask window to open the list of your accounts.
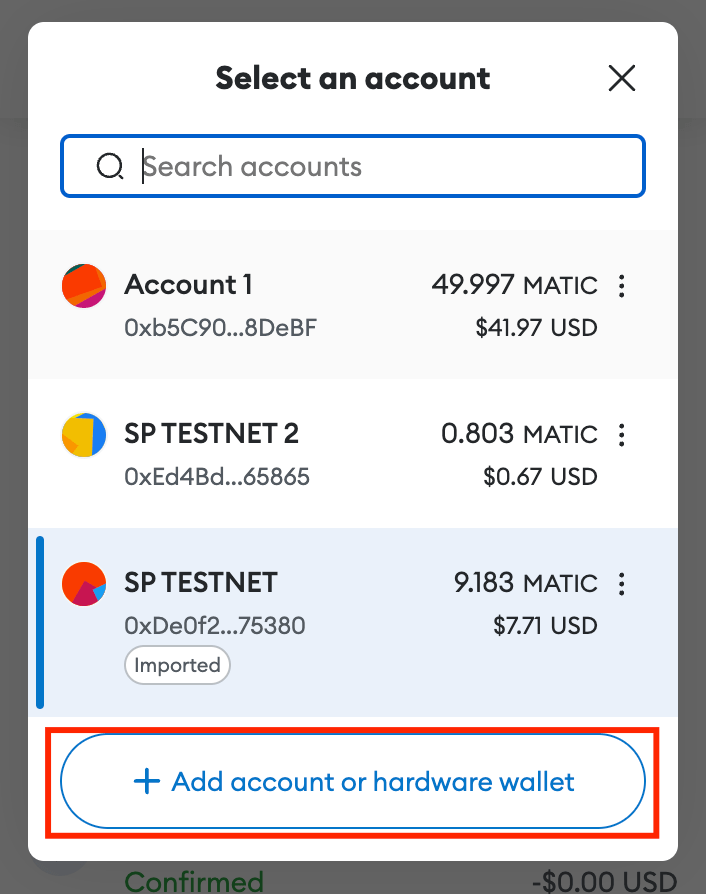
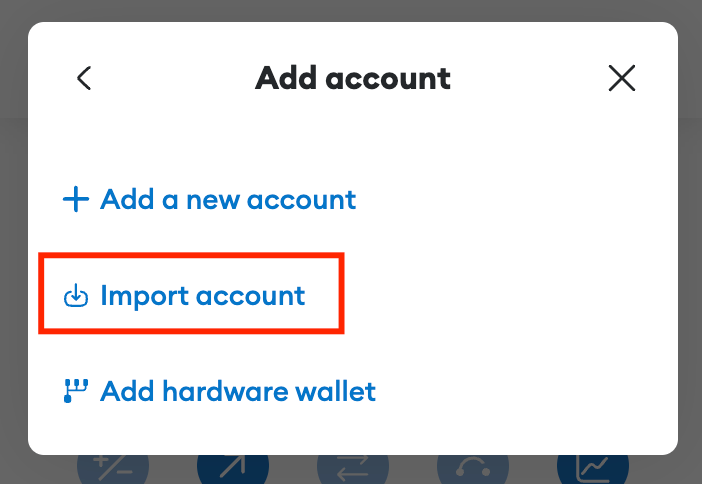
Click Add account or hardware wallet and select Import Account.
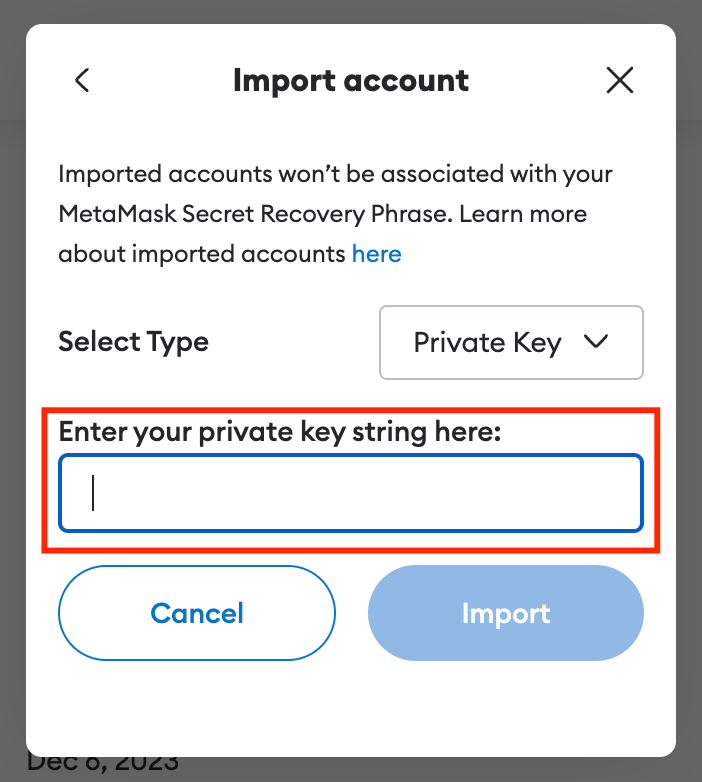
Enter the Private Key you received from Super Protocol and press the Import button. Testnet Private Key looks something like this:
0xb8371e9b2mr9f6e2b9e5ec1ead09b731607b923125c2faae6076df72f37e4b2e
Step 5. Check the account
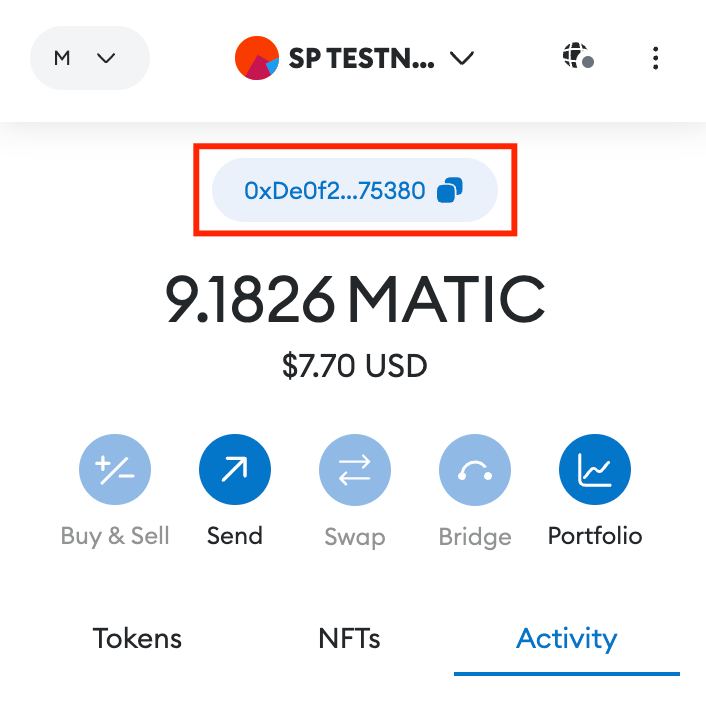
Ensure that the imported wallet address matches the Testnet Account address you received in the Testnet invitation letter. The Testnet Account address looks something like this:
0xDe0f32cJ7a2c3j85a3E572972EC7764154e75380
You can rename this account into Super Protocol Testnet or anything you like to quickly find it next time, especially if you have several other wallets in your MetaMask. Open the list of your MetaMask accounts, go to Account details, and click on the pencil icon near the wallet name to change it.
Do not use this account outside of Testnet!
Super Protocol generates ERC-20 wallets for use during Tesnet only. Do not use your Testnet Account wallet elsewhere or put your funds in it. The Super Protocol team also has the Private Key to your Testnet Account, so it is not truly yours.
Step 6. Connect the wallet
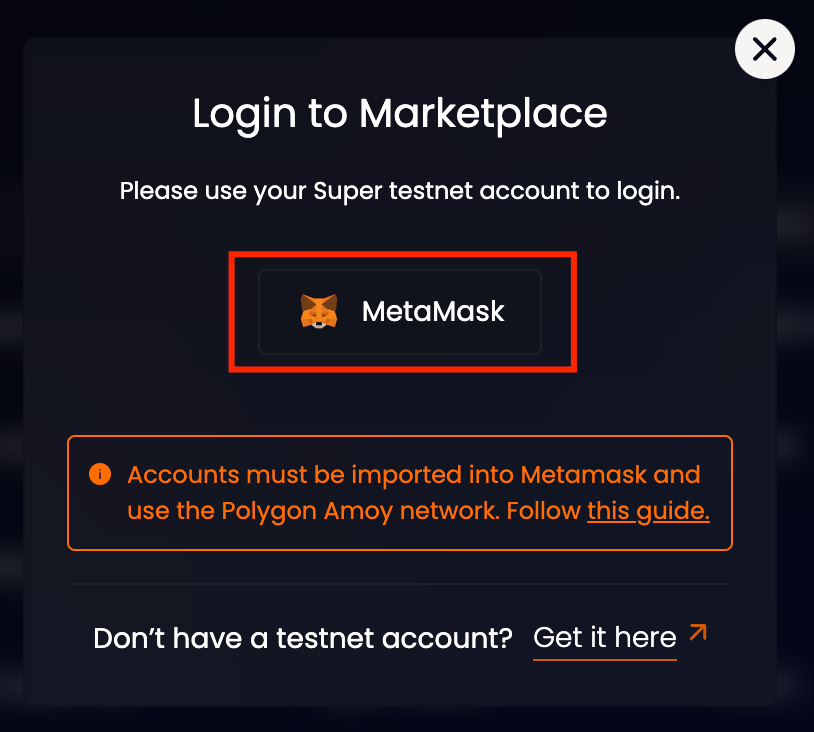
To connect your wallet, open the Marketplace GUI and press the Connect Wallet button at the top-right corner.

In the pop-up window, click MetaMask.
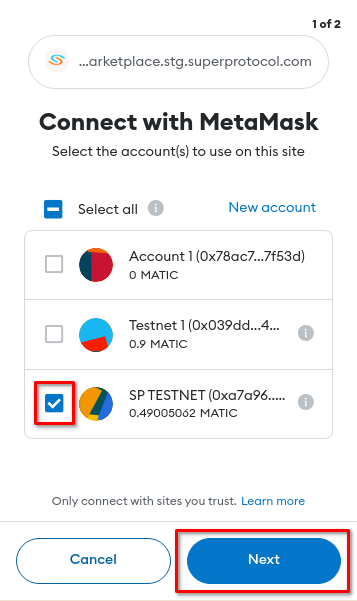
Then open your MetaMask, select your Testnet account, and click Next.
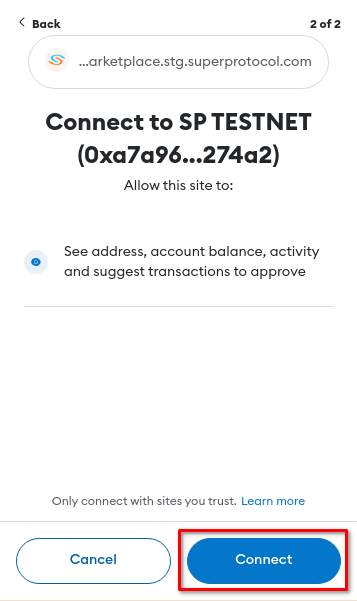
Finally, click Connect.
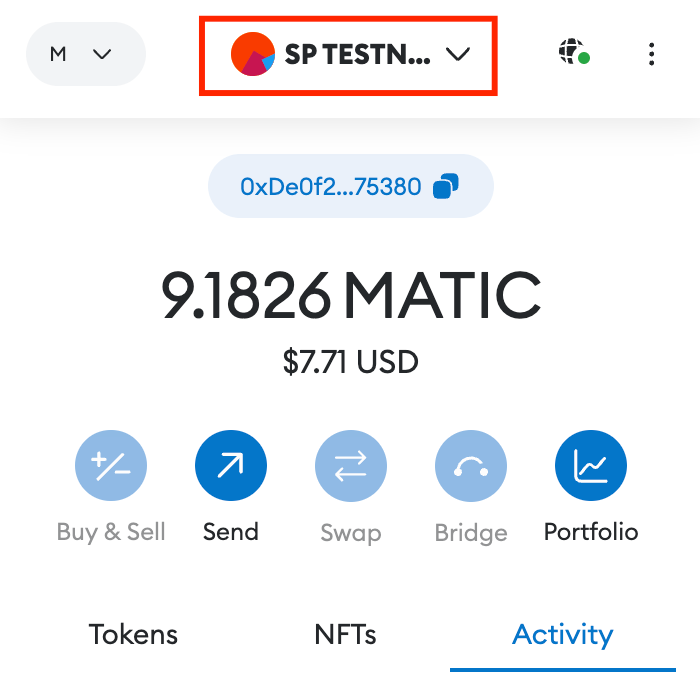
If everything is done correctly, you will see your account address and token balance.

Step 7. Get testnet tokens
Super Protocol uses two types of tokens, and you will need both of them:
- BNB tokens, to pay for opBNB blockchain transactions.
- SPPI tokens, to pay for offers and receive payments in Super Protocol.
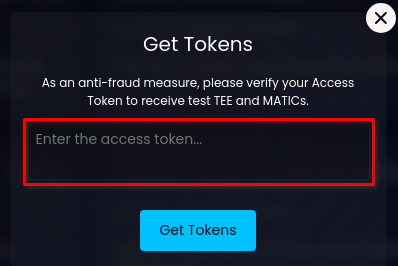
To get tokens, use the buttons at the top of the page.

When you request tokens for the first time, the system asks you to enter your Access Token. You can find it in the Testnet invitation letter next to your Testnet Account and Private Key. The Access Token looks something like this:
eyJhbGciOiJFUzI1CiJ9.eyJhZGRyZXNzIjoiMHhEZTBmMjljRTdhMmMyZDg5YTNFNjg4OTcyRUM3NzY0PDU0ZTc1LzgwIiwiaKF0IjoxNjYwOTE4MTU4LCJleHAiOjE2OTI0NzU3NTh9.cNC2CFfqO3UN8RuMpAFUp0zI5wXEOIR_xk9Ejvmv7lzyF6SPo_f83R2SOBDg1Tp1ldS7O1dLvjL6DuXlwUs4Lw
Note that there is a limit to the maximum balance of each token in one account. If you reach this limit, you can only request additional tokens once you spend some of them. Refer to testnet limitations.
Do not send POL tokens to other accounts. Violators will be banned from using the Super Protocol Testnet.
Troubleshooting
If your Access Token doesn't work, check that you didn't accidentally copy it with line break characters or spaces.
Also, ensure you have selected the correct account. Your Access Token only works with the Testnet account you received from Super Protocol. If you see the following error, you are trying to connect with the wrong MetaMask account:

In that case, open MetaMask and change the account.
Then, click the Connect Wallet button in the Marketplace GUI again and select the account you configured for Testnet.
Support
If you have any issues or questions, contact Super Protocol on Discord or via the contact form.